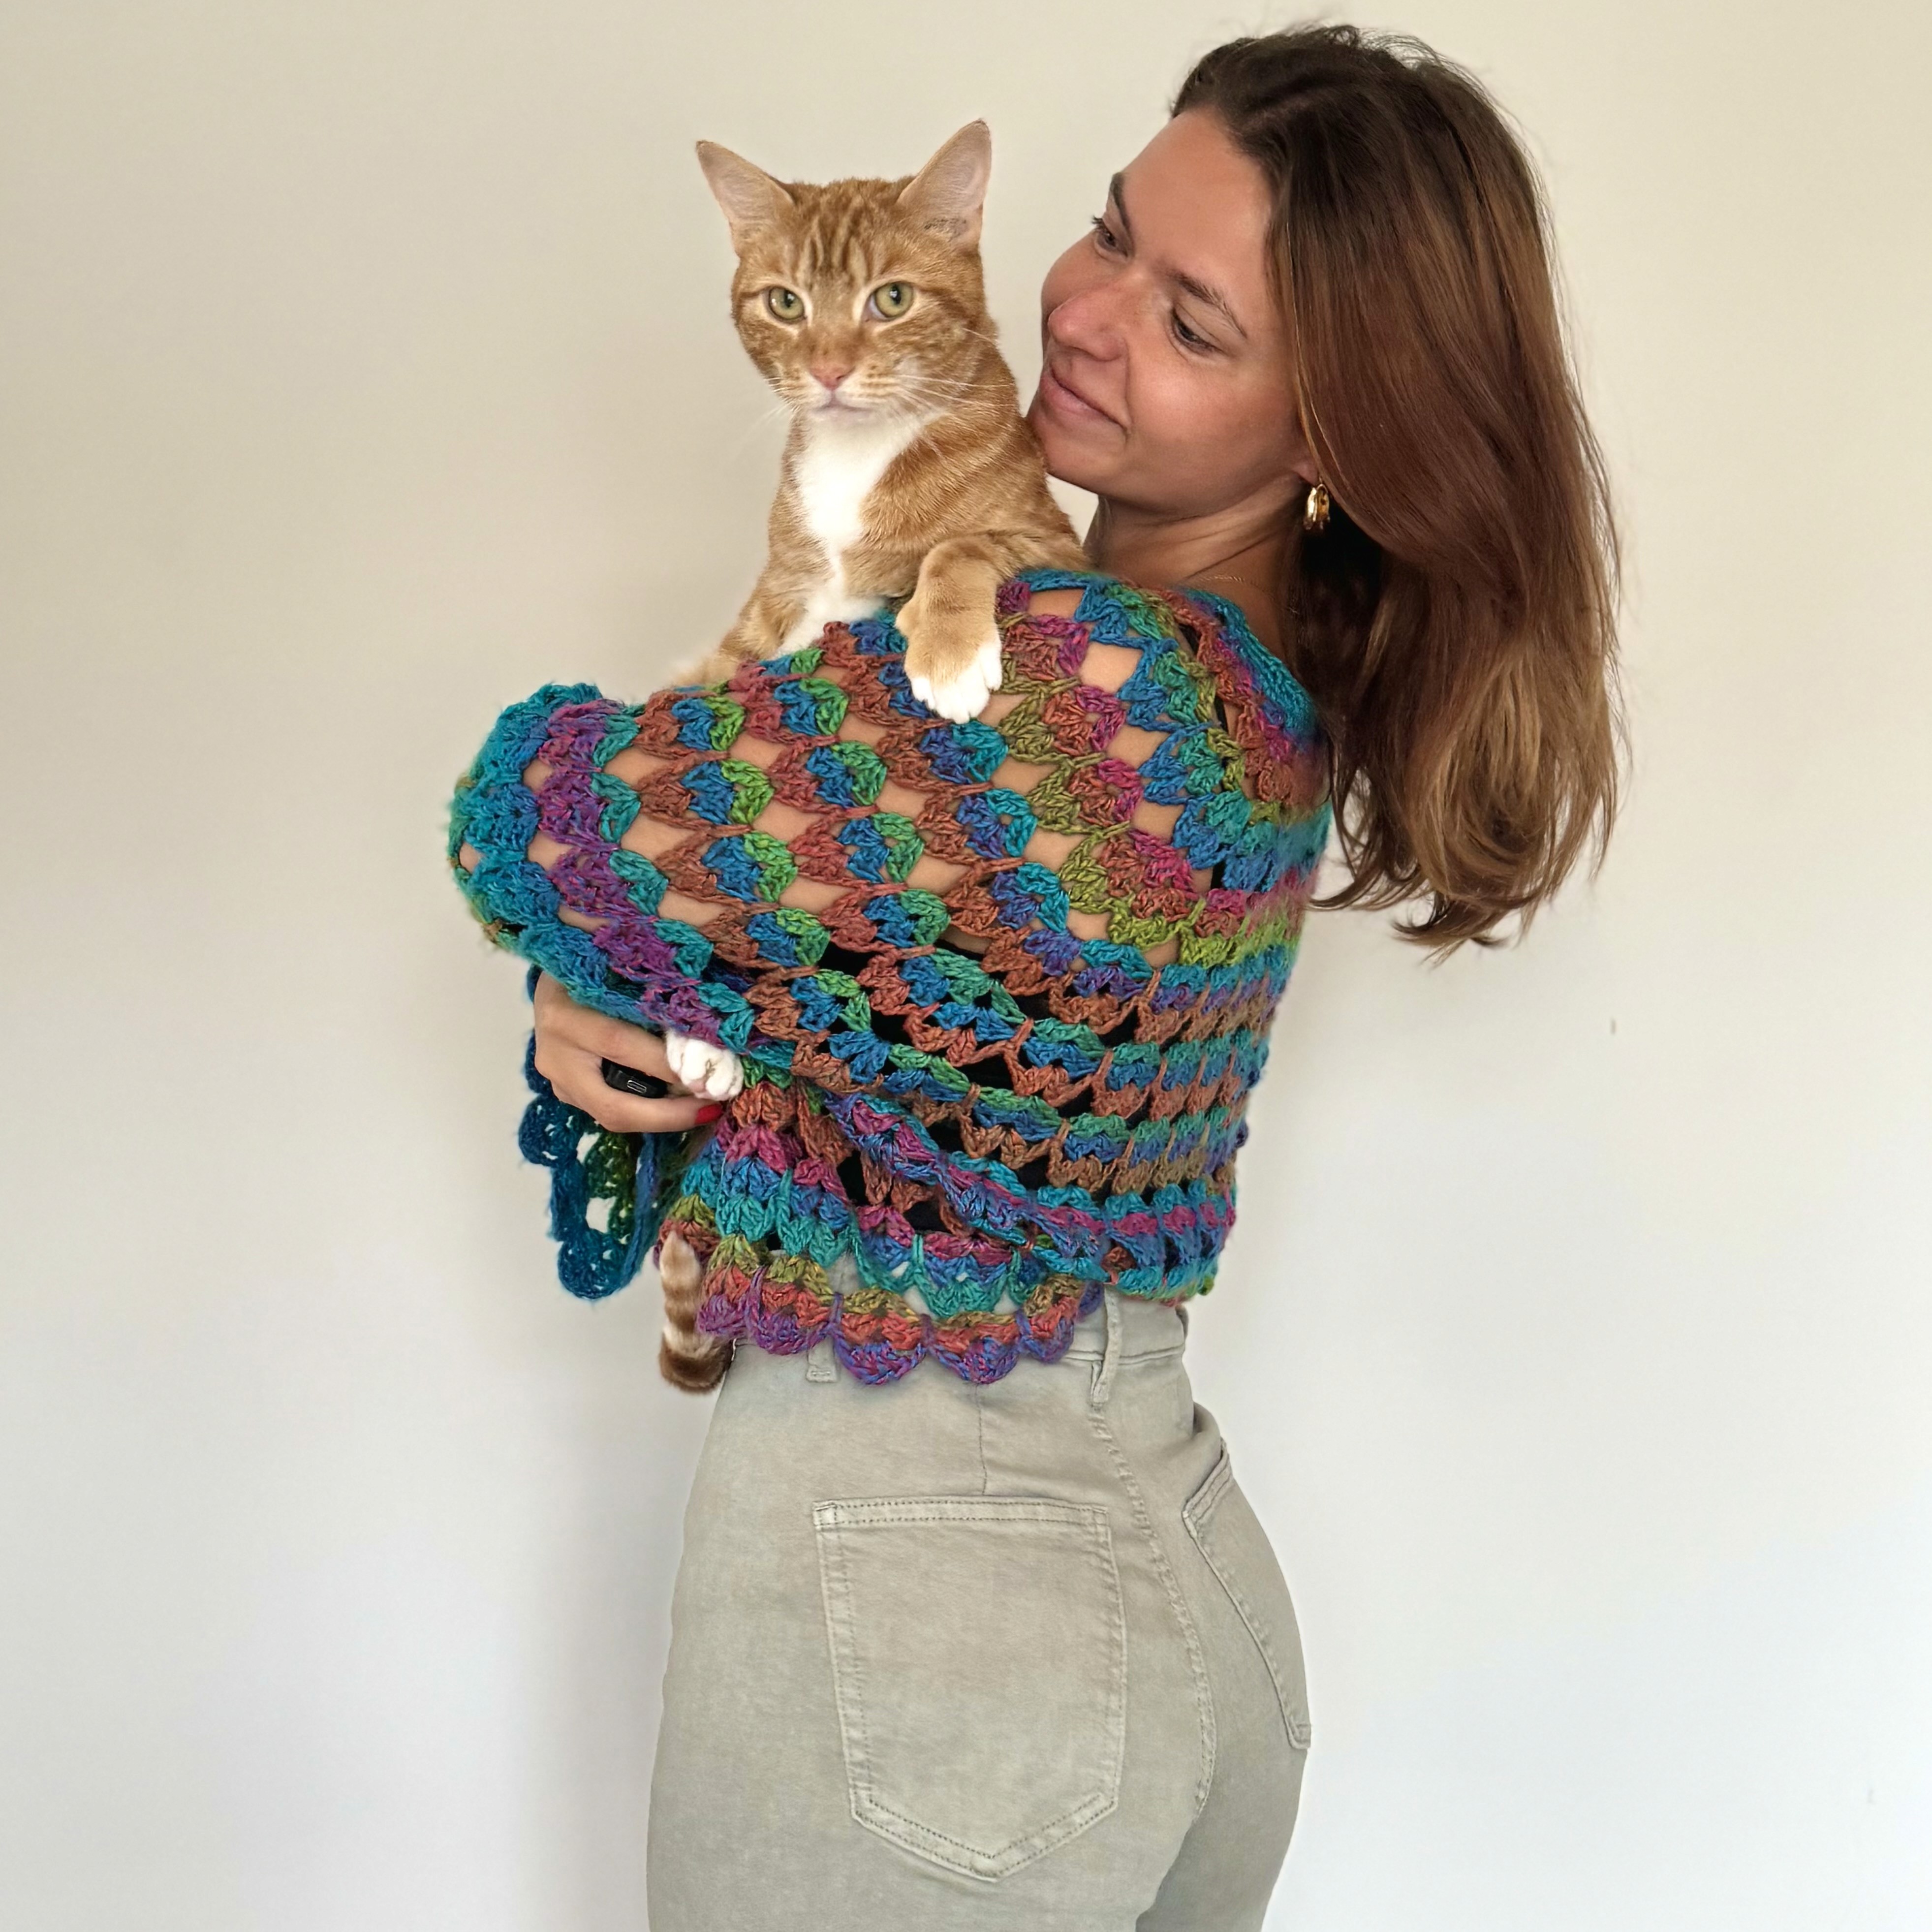
seamless 01
the straight sleeve jumper
2025

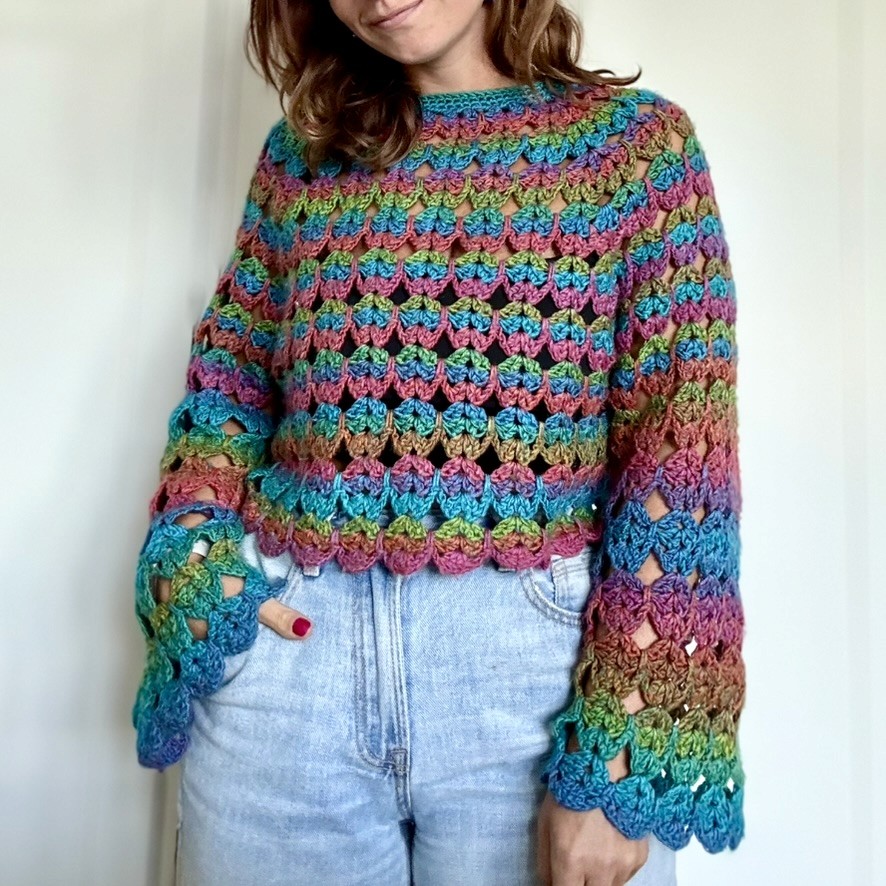
A made-to-measure, top-down crochet pattern featuring raglan shaping and a seamless sleeve construction.
about this pattern
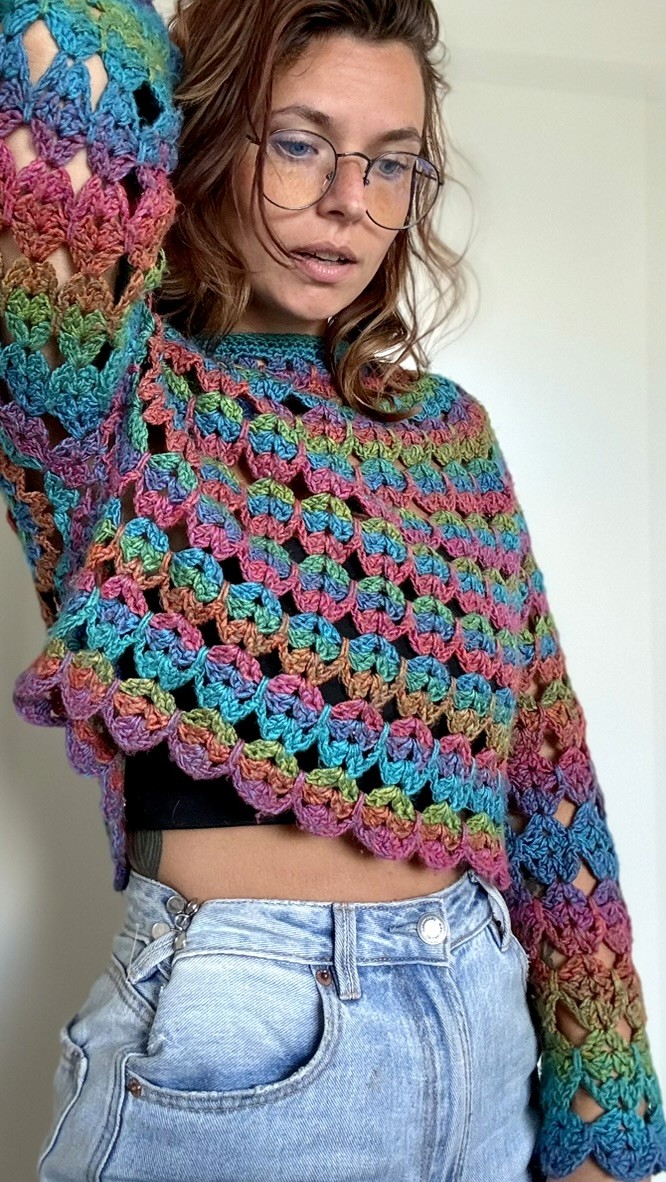
This pattern uses the Disc Stitch, a combination of shell and spike rows, to create a repetitive oval pattern. It features seamless sleeve construction and raglan shaping.
recommended skill: confident beginner (google is your friend!)
estimated time: 6-15 hours
how to read this pattern
Each section of the pattern follows the same structure:
Set up
Repeat rows instructions
Once a row has been introduced, it won’t be fully re-written later on. If it comes up again in a different section, it will be referred to by its row title (e.g. Row 1: Shells), unless the instructions have changed — in which case, you’ll get the updated version.
To make things easier to follow, every row instruction is paired with photos which uses colour-coded yarn to match row types, so you can clearly see how the different rows repeat and build on each other.
This format is designed to teach you how each section of the jumper works. Once you understand the pattern repeat, you can decide how many times to work it to get your ideal fit and size.
Starting instructions and suggested section repeats are provided for two reference projects in the sample projects section:
The mini tee – ideal for testing your tension and gauge after blocking (sleeves not needed for this).
The example jumper – follow this if your gauge matches and you want to replicate the same size and shape. • materials
special notions: 4 stitch markers (you can use scrap yarn, safety pins, anything - even earrings)
hook: match recommended hook size for yarn or 0.5 - 1mm larger.
yarn: any fibre and weight, but recommended is:
cotton (non-elastic):
use up to worsted / aran weight. Slight softening with wet blocking.acrylic (elastic):
use up to bulky / chunky weight. Will relax significantly with steam blocking
yardage: highly dependent on yarn weight and size.
For specific material guidance, look at the makers gallery to see completed seamless 01 patterns and the materials used.
blocking: steam blocking is recommended, especially for elastic synthetic fibres, because it allows you to easily and quickly block as you go to check the fit and relaxes the fibres to achieve a better drape.
sizing & fit
It’s recommended to try the piece on as you go to ensure the fit is perfect for your body. It’s designed to have a relaxed, slouchy fit, and guidance for adjustments are provided.
gauge
A gauge is not needed if you block and try on your piece as you go (which is the recommended and preferred method).
If you want to crochet a gauge first, follow the pattern using the instructions for the mini tee, then calculate the number of spike rows and shell stitches you need to achieve your desired dimensions.
stitch key
This pattern uses US crochet terms.
basic terms:
chain (ch)
slip stitch (sl-st)
single crochet stitch (sc)
double crochet stitch (dc)
special stitches:
stacked double crochet (st-dc)
2 sc worked on top of each other - you can substitute with ch-3 if preferred
half shell stitch (half shell)
2dc in designated space except at start of row: (st-dc, dc) in current ch-1 sp
shell stitch (shell)
(2 dc, ch-1, 2 dc) in designated space
spike stitch (spike)
sc between shells 2 rows below
There are plenty of youtube videos and tutorials to help with these stitches if you need more support!
stitch chart
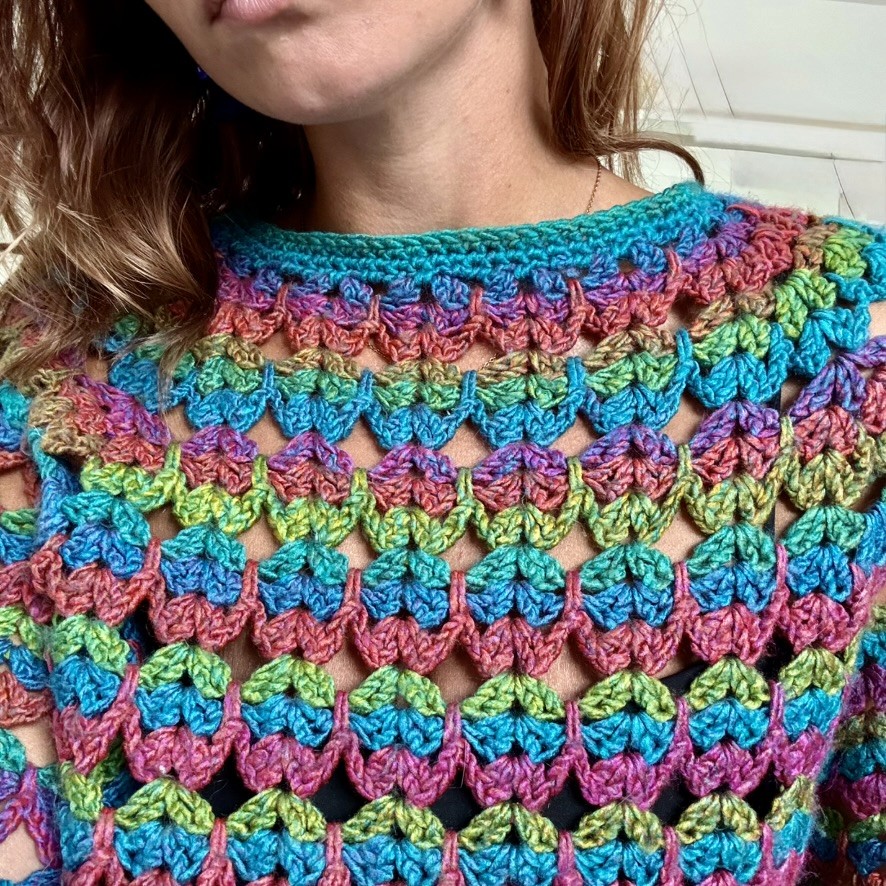
This pattern uses the Disco Stitch. This consists of shell stitches placed on top of each other with ch-2 and spike stitches wrapping each shell every 3rd row to form oval shape clusters with diamond shaped holes. construction
This jumper uses a top-down raglan construction.
You’ll start at the neckline with a foundation round of shells, mark out the raglan points either side of your shoulders and work a 6-row increase pattern repeat that adds 4 shells every 3 rows (8 total every complete repeat) until the yoke reaches your underarm (or your desired depth).
The front and back panels are then joined and the body is worked in the round to your desired length.
Each sleeve starts at the underarm and will follow a regular 3-row stitch repeat to achieve a uniform straight sleeve.
pattern notes
work in the round throughout unless otherwise stated
the piece will be symmetrical, so it's up to personal preference if you turn after each round (turning will mean it's reversible, no turns for each row means there's a RS and WS)
move your stitch markers up maintain the raglan points each round (trust me)
spike stitches should be loose to prevent puckering
if you want the front and back panels to be broader than the sleeve panels (recommended for bigger busts), starting chain should be a multiple of 32.
about this pattern
raglan
set up
You’ll start at the neckline and work from the top-down. The length of the starting chain will determine the width of your neckline so feel free to experiment at this point!
—
Starting chain
Ch a multiple of 16 to match your neckline size and check it fits comfortably over your head.
Sl-st to the back bump of the first ch to join in the round, being careful not to twist the chain
Set up row 1: Shells
Place st-dc (counts as first dc) and 1 dc in back bump of same ch - half shell.
(Skip 3 ch, shell in back bump of next ch) repeat until 3 ch remain.
Skip last 3 ch, 2 dc in same ch as half shell, ch-1, sl-st to top of st-dc - completes final shell at join.
The yoke will now be divided into 4 panels: front, back, left sleeve, and right sleeve.
You’ll place 4 stitch markers to indicate where your raglan increases will go on each round. These are placed between specific shells to mark the panel boundaries.
There’s a small amount of maths needed to place your stitch markers correctly, but it’s simple and only needs to be done once.
Step 1: Calculate raglan points
Calculate the number of shells in each panel if shells are distributed equally between them (x):
x = starting chain / 16Calculate the number of shells for each front / back panels (a) and sleeve panels (b)
If starting chain is multiple of 32:
a = x + 1
b = x - 1
Else:
a = x
b = x
Step 2: Place markers
PM1 after shell [x / 2],
PM2 [b] shells after PM1,
PM3 [a] shells after PM2,
PM4 [b] shells after PM3
You should now have [a] shells between PM1 and PM4. pattern repeat
You're ready to start your yoke! You’ll work the following 6-row repeat to add 4 shells every 3 rows and lengthen your jumper as it widens.
There are 4 types of rows that make up the 6-row repeat. It might look like a lot, but you’ll get into the rhythm quickly.
—
You’ve just done a Shell row so you’ll next be working an Increase between shells row.
Inc row 2: Increase between shells
Half shell in ch-1 sp of joining shell, then shell in each ch-1 space between markers.
At each marker, place a shell in the marked gap between shells.
Finish with half shell, ch-1, sl-st to top of st-dc.Move markers into the ch-1 spaces of the new raglan shells.
Row 3: Spikes
Half shell in ch-1 sp of joining shell, ch-2, place spike between shells, ch-2,
(shell in next ch-1 sp, ch-2, spike, ch-2) repeat til you reach joining shell again.
Finish with half shell, ch-1, sl-st to top of st-dc.
Move markers into the ch-1 spaces at raglan points.
Inc row 4: Increase within shells
Half shell in ch-1 sp of joining shell, then shell in each ch-1 sp between markers.
At each marked ch-1 sp, place an increase shell (2 dc, ch-1, 2 dc, ch-1, 2 dc)
Finish with half shell, ch-1, sl-st to top of st-dc.
Move markers between the ch-1 spaces at raglan points.
Row 5 (and Row 1): Shells
Half shell, then shell in each ch-1 space around.
Finish with half shell, ch-1, sl-st to top of st-dc.
Move markers between shells at raglan points, as you did after Row 1.
Row 6: Spikes
Half shell, ch-2, spike, ch-2, (shell in next ch-1 sp, ch-2, spike, ch-2) repeat to end.
Finish with half shell, ch-1, sl-st to top of st-dc.
Move markers to spike stitches at raglan points.
Continue the increase pattern repeat, finishing on a spike row (either row 3 or 6), until your yoke reaches the desired depth (usually just below the underarm).
body
set up
At this point, your yoke should have a clear square / oval shape, with subtle raglan lines and short capped sleeves forming over your shoulders.
Your sleeves are ready to be separated when the front and back panels reach just below your armpits, and the raglan points can comfortably touch under your arms.
—
The next row you'll work to separates the sleeves differs slightly depending on if you finished on increase row 3 or increase row 6 from the raglan pattern repeat.
Set up row 1: Join body panels
If you ended on inc row 3 so the raglan points (M1-4) are in the ch-1 sps of shells:
Half shell, then shell in each ch-1 sp up to M1
2 dc in ch-1 sp at M1 (half shell)
Skipping sleeve shells, place 2 dc in marked ch-1 sp at M2 (half shell - completes shell and joins sides).
Shell in each ch-1 sp across front panel
Repeat for second sleeve (M3 & M4)
Finish with half shell, ch-1, sl-st to top of st-dc
You can remove the stitch markers
Continue to Set up row 2
If you ended on inc row 6 so the raglan points (M1-4) are in the spikes between shells:
Half shell, then shell in each ch-1 sp before M1
2 dc in ch-1 sp after M1 (half shell)
Skipping sleeve shells, 2 dc in ch-1 sp before M2 (half shell — completes shell and joins sides)
Shell in each ch-1 sp across front panel
Repeat for join for second sleeve (M3 & 4)
Finish with half shell, ch-1, sl-st to top of st-dc
You can remove the stitch markers
Set up row 2: Shells
Half shell, then shell in each ch-1 sp across panels including between the 2 half shells at joining points from Body row 1.
Finish with half shell, ch-1, sl-st to top of st-dc.
Set up row 3: Spikes
Half shell, ch-2, spike, ch-2,
*shell in next ch-1 sp, ch-2, spike, ch-2* repeat to end
Finish with half shell, ch-1, sl-st to top of st-dc.
pattern repeat
The body panels have been joined so now you’ll be working in the round with no increases, following a 3-row repeat with rows you’ve already learnt.
—
Work the 3-row repeat to add length to the body until it reaches the size you want. sleeves
set up
You’re about to add your sleeves! Yay! The start can be a bit fiddly, but the join is at the underarm so don’t worry if you don’t get it perfect.
—
Set up row 1: Join at underarms
Reattach yarn between the half shells at the underarm where you joined the front and back panels earlier.
St-dc in space, half shell in worked ch-1 sp of first shell along sleeve,
Shell in each ch-1 sp around sleeve
Half shell in worked ch-1 sp just before starting st-dc
Finish with sl-st to top of st-dc to join
Set up row 2: Shell row
Half shell in top of st-dc, then shell in each ch-1 sp around sleeve
Finish with half shell in same stitch as starting half shell, ch-1, sl-st to top of st-dc.
Set up row 3: Spike row
Half shell in ch-1 sp of joining shell, ch-2, place spike between half shell and shell, ch-2
*shell in next ch-1 sp, ch-2, spike, ch-2* repeat til you reach joining shell
Finish with half shell, ch-1, sl-st to top of st-dc
pattern repeat
It’s smooth sailing from here - you’ll be working the sleeve like you did with the body, adding length without increasing the width until it’s the size you want.
—
Work the 3-row repeat to add rows to the sleeve until it reaches the length you want.
Remember to try it on as you go, blocking if you can for best fit if you’ve not tested tension.
Make a note of the number of rows you’ve completed once you’re happy with the length, and repeat steps for the other sleeve.
finishing neckline (optional)
Row 1
Reattach yarn at neckline centre back where you joined the starting chain in the round.
sc, 3 sc in ch-3 sp
*sc in shell ch, 3 sc in ch-3 sp* repeat til end of round
sl-st to sc to join
Row 2
In this row you’ll be placing spike stitches to close the gaps at the neckline. These will be in placed 1 row below in the middle of a shell stitch (between the 2 half shells) or a spike stitch (between legs of the loose sc).
sc in current stitch, sc in next 2 sc, loosely spike
*sc in next 4 sc, loosely spike* repeat til 1 sc from end
sc, sl-st to sc to join.
Row 3
sc around, sl-st to join
Tie off and weave in ends.
Ta-da!! You’ve finished the straight sleeve seamless 01 jumper!